Contents:
Editing Custom Events
Navigate to the "Events" tab under "Menu & Content."
Find the event you wish to edit, and click the pencil icon on the top right corner of the event.
-png-1.png?width=670&height=102&name=annotely_image%20(10)-png-1.png)
From there, you can:
- Edit the event name
- Customize the description
- Change the photo
- Change the start and end time
- Change the date only for some events. For one-time events, you can freely change the date. For recurring events, date changes must follow the existing pattern — for example, a Friday event can only move to another Friday.

⚠️You cannot change the event type or the set recurrence . To switch between one-time and recurring, or adjust how often it repeats, create a new event with the correct setup.

To delete a custom event, click the trash can icon on the right. You will then be prompted to confirm the deletion.
-png-1.png?width=670&height=102&name=annotely_image%20(13)-png-1.png)
Editing Events from Promotions
Some events are created through Campaigns & Promotions using standard promotions. These include a banner noting they originate from the promotions page.
To edit, go to Menu & Content → Events and click the orange "Go to promotions page to edit event" button in the lower-right corner of the event.
-png-1.png?width=661&height=141&name=annotely_image%20(11)-png-1.png)
The corresponding promotion will open. Click "see details/edit" in the top right corner,
-png-1.png?width=656&height=185&name=annotely_image%20(12)-png-1.png)
and make changes under the Events Page tab — including event name, description, image, date, or time. Don't forget to save the changes at the end.
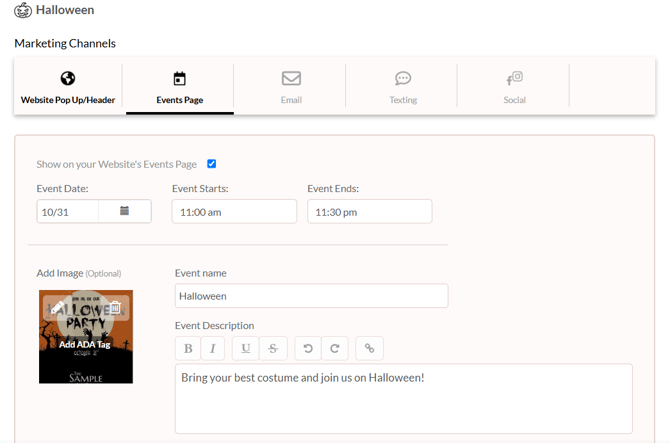
To delete the promotion from the Events page, uncheck the "Show on your Website's Events Page" box.
-png-2.png?width=647&height=229&name=annotely_image%20(12)-png-2.png)
Promoting Events
After your event has been created, you can easily schedule social media posts, emails, and texts by selecting the checkboxes below the event.
-png.png?width=670&height=144&name=annotely_image%20(16)-png.png)
Social Media Posts
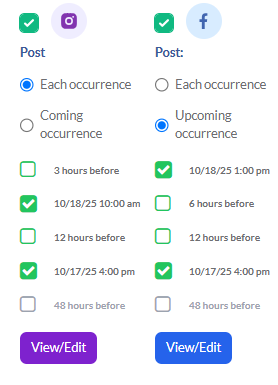
Each event includes multiple scheduling boxes for social media posts, letting you plan several posts per event. The available options vary depending on whether the event is recurring or one-time.
For recurring events, you can schedule social media posts for each occurrence or for the next upcoming occurrence only.
To send a marketing email, make sure the Email box below the event is checked. ![]() You’ll see a preview pop-up where you can review and edit when the email goes out. Click the pencil icon next to “Will send to...(date/time)” to manage when the email will be sent.
You’ll see a preview pop-up where you can review and edit when the email goes out. Click the pencil icon next to “Will send to...(date/time)” to manage when the email will be sent.
-png.png?width=581&height=235&name=annotely_image%20(17)-png.png)
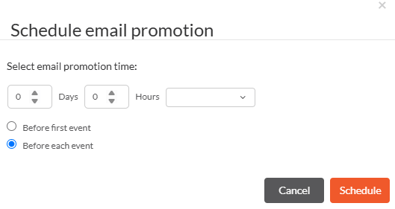
If you are scheduling an email for a one-time event, simply choose the date and time and hit "Schedule."

For recurring events, you can schedule marketing emails to send before each occurrence or only before the first event.
Text
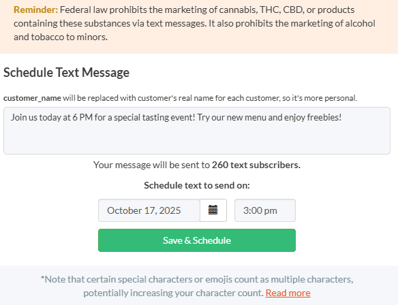
To schedule and send a text blast, simply check the message bubble box found below the event. Your event description will automatically appear as the text message, but consider shortening it to stay within the character limit.
When done, click Save & Schedule.
💡 Best Practices for Event Promotion
| Strategy | Why It Works |
|---|---|
| Use high-quality images | Eye-catching visuals drive engagement |
| Schedule multiple reminders | Keeps your event top-of-mind |
| Mix channels | Reach more guests by using both email + social |
| Update recurring events | Refresh descriptions to maintain interest |