Contents:
-
Customizing Menu Items (Additions/Substitutions)
a. Adding Additions/Substitutions
b. Editing or Removing Additions
If you’re using SpotHopper’s Online Ordering system, keep in mind that your online ordering menu may include add-ons and options—like sides, sauces, or toppings—that can change the total price at checkout.
Configure these options properly to ensure a smooth and accurate ordering experience for your customers.
Enabling Items for Pickup and Delivery
1. Navigate to the "Menu & Content" cluster and select "Menu."
2. On the Select Menu page, open the menu you wish to update by clicking the associated pencil icon.
-png.png?width=641&height=212&name=annotely_image%20(81)-png.png)
3. Locate the menu item you’d like to update. On the right-hand side, you’ll see three red icons:
-png-1.png?width=670&height=79&name=annotely_image%20(79)-png-1.png)
![]() Table (Dine-In) – Displays the item on your website’s menu page.
Table (Dine-In) – Displays the item on your website’s menu page.
![]()
Bag (Pickup) – Makes the item available for online pickup orders.
![]()
Truck (Delivery) – Makes the item available for online delivery orders.
Check or uncheck the boxes next to each icon to set where your item is displayed:
- Website only - Not available for Online Orders: Check the Table icon and leave Bag and Truck unchecked.
- Pickup only: Check the Bag icon and leave Table and Truck unchecked.
- Delivery only: Check the Truck icon and leave Table and Bag unchecked.
- Pickup and Delivery: Check both Bag and Truck, leave Table unchecked. The selected item will only be displayed on your online ordering page and not on your website menu.
- Website and Online Ordering: Check Table, Bag, and Truck to display the item in all menus.
Customizing Menu Items
SpotHopper allows you to give customers flexibility when ordering online by adding custom options—such as sides, substitutions, or toppings—that can modify the item’s price.
Adding Additions/Substitutions
1. Find the menu item you wish to customize and click the gray "Additions/Substitutions" button on the right side.
-png-1.png?width=670&height=112&name=annotely_image%20(82)-png-1.png)
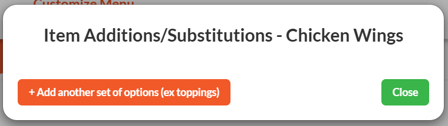
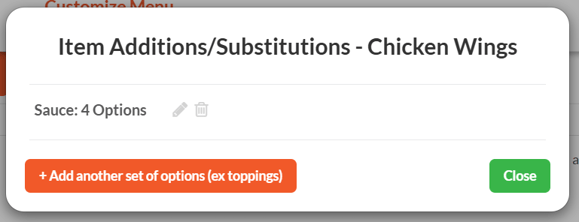
2. On the Items Additions/Substitutions pop-up, click the orange "Add another set of options (ex toppings)" button.
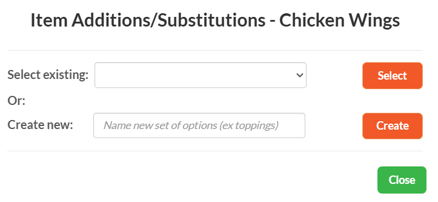
3. Here you can:
-
Add previously created additions from the "Select existing" drop-down.
-
Or, type a new option name (e.g., Sauce) and click "Create."
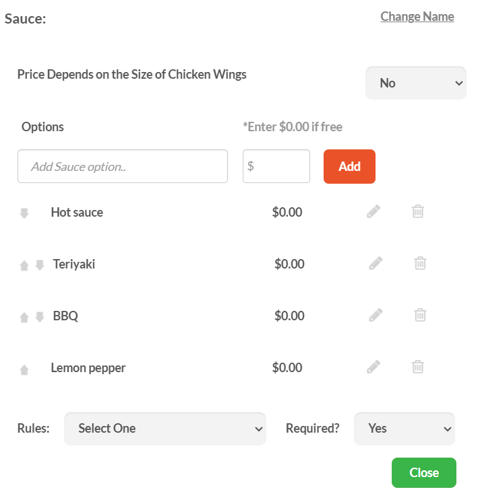
4. Once you enter the name of your addition and click "Create," you can customize the details:
-png.png?width=450&height=395&name=annotely_image%20(83)-png.png)
1) Price Depends on the Size of Menu Item - You can set the price to vary according to the size of the food item. For example, if you offer both small and large pizzas and charge for extra cheese, set this option to "Yes" to assign different prices for each size.
2) Add option - Enter the name of the option you're adding. In the example above, our addition is sauce, so here we would list the type of sauces (e.g., Hot, BBQ, etc.).
3) Enter the price for the addition - Specify the price for your option. If the addition is free of charge, make sure to add 0.00.
4) Rules - Define how many selections a customer can make. For instance, if customers can choose only one sauce with chicken wings, select "Select one." If they can choose up to two sauces, select "Select up to 2," and so on.
5) Required? - Determines whether the selection from the Rules section is required. If customers must choose a sauce before checkout, set this to "Yes." This ensures they can’t complete the order without making a selection.
Here is an example for a multiple-sauce addition that is free of charge and required with each order:
You can have multiple additions for a single item. When done with the first one, just hit "Add another set of options." When done creating the additions, simply click the "Close" button, and the changes will be saved.
Editing or Removing Additions
Click the gray "Additions/Substitutions" button next to the menu item you’ve configured.
This will open the pop-up with the additions.
-
Click the gray pencil icon to edit an existing addition.
-
Click the trash can icon to remove an addition you no longer want.
-
Click "Add Another Set of Options" to create a new group of choices.