-
-
-
- Adding and Managing Parties
-
-
-
- Add customers to the waitlist by tapping the orange "+" icon at the top of the "Waitlist" submenu.
- The “Add Party” form will appear on the left.
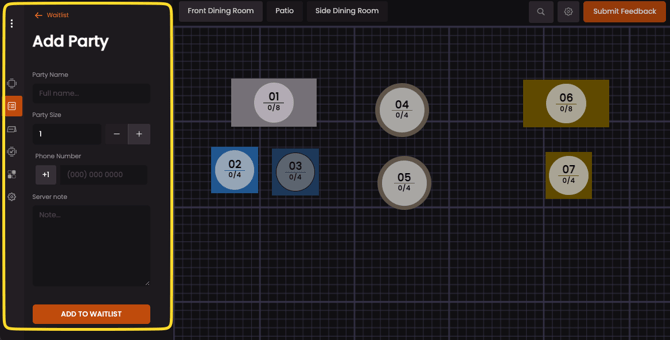
You can add guest details including: - Party name
- Party size
- Phone number
- Server notes
- Add customers to the waitlist by tapping the orange "+" icon at the top of the "Waitlist" submenu.
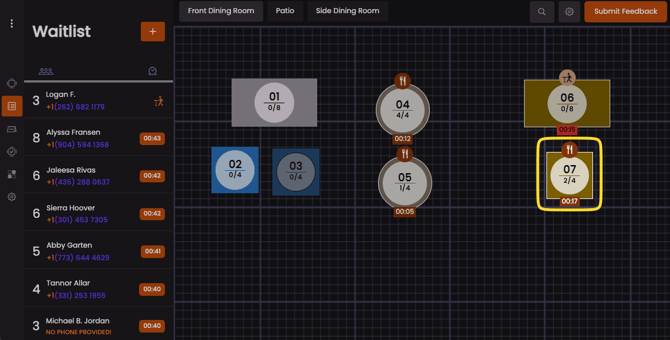
- The waitlist is ordered sequentially. Parties who have waited the longest amount of time will be at the top of the list - as noted by the total minutes waiting in orange.
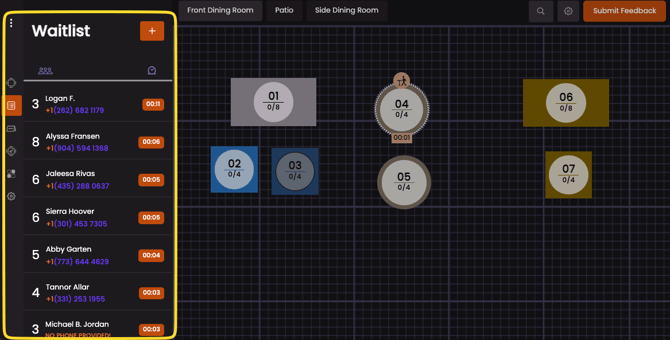
- There are a number of icons to pay attention to in order to provide the best service possible to waiting diners.
- Party Size and Name

- For example, this party on the waitlist for Tom is a two-top table.
- Timing details

- Tom's party has been waiting '19' minutes as seen by the time within the orange rectangle.
- Reservations

- The purple 'reserve' plaque marks that Tom is a reservation and should be prioritized over walk-ins on the waitlist.
- The purple 'reserve' plaque marks that Tom is a reservation and should be prioritized over walk-ins on the waitlist.
- Seating Your Customers
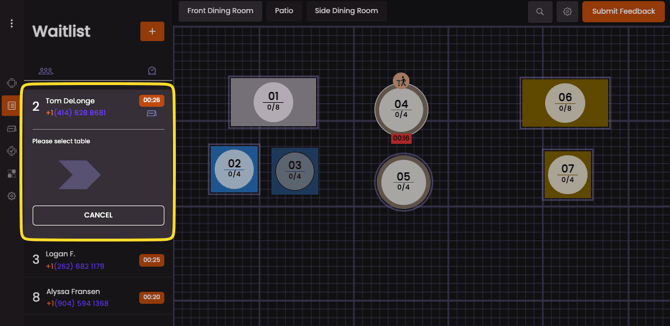
- Select a party on the waitlist to expand the individual details and select 'SEAT IMMEDIATELY' to assign them a table. Let's walkthrough seating Tom's party.
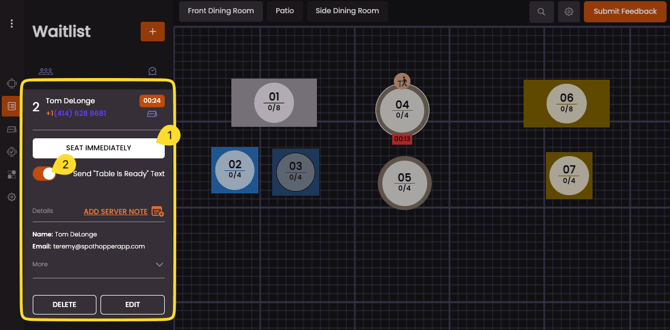
- Here you can also review or add 'Server notes' as well as view all details for reservations by clicking the 'More' button. Sometimes diners share that they have a gluten allergy or a special occasion that their server should be aware of.
- Choose an open table on the floor for the party.
- A confirmation window showing the SMS was sent to the customer will appear.

- Your customers will see transactional text messages that depend on your app's settings. Here is one example below:
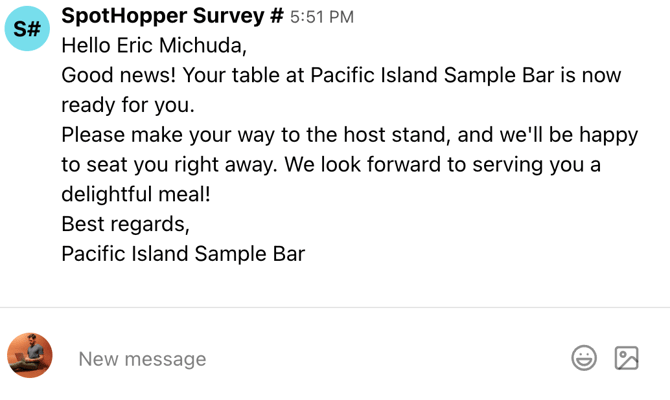
- Your customers will see transactional text messages that depend on your app's settings. Here is one example below:
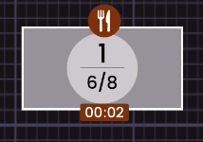
- After selecting 'SEAT IMMEDIATELY', the customer's table will now appear as 'Assigned'. But they're not yet seated. The elapsed time at the bottom of their table is how much time has passed since the customer was notified that their table is ready.
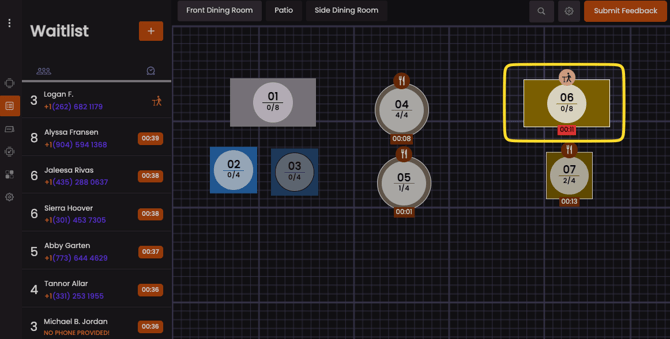

- On the waitlist, you'll know who has been 'assigned' but not yet 'seated' at a table by the orange graphic of a person walking to a table.

- An 'assigned' table on the floor plan will show how long ago the customer was notified. This customer below was notified 11 minutes ago.

- Any party's table that was 'assigned' more than 10 minutes ago will be highlighted red on the floor plan. This helps hosts have a clear idea of when to drop a party from the waitlist. Here is what you can do if a party has taken too long to seat.
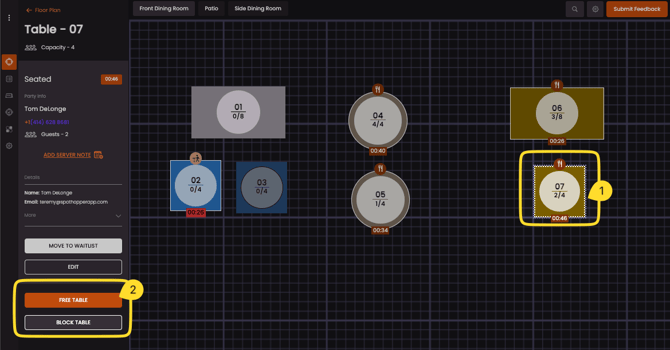
- Once Tom's party is ready to be seated, select 'PARTY SEATED' under their name.
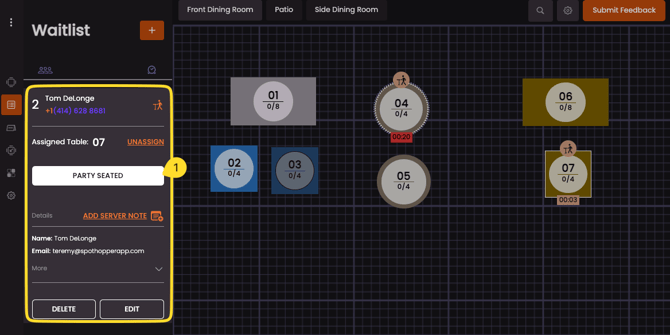
- In this case, the table now shows that Tom is seated at table 7.
-
The elapsed time at the bottom of the table is how much time has passed since the party was seated. This table has been seated for 2 minutes.
- Clear finished tables by selecting the table and then selecting 'FREE TABLE'.
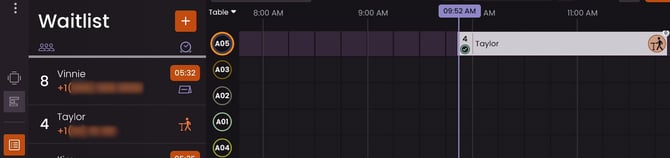
Dragging Parties from Waitlist to Floor Plan - Drag the party from the Waitlist to a table on the Floor Plan.

-
Parties assigned to tables by dragging are set to Pre-Seated immediately,
and the timer starts.
- Do the same in Timeline View — drag a party and release it to set it at the current time.
- The party is now in Pre-Seated status on the assigned table.
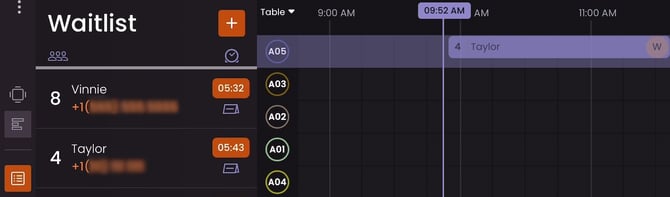
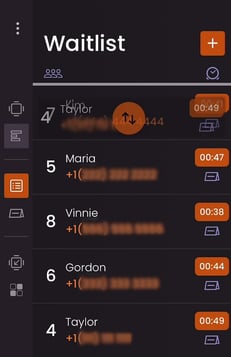
- A long press on a party in the Waitlist allows you to reorder it.
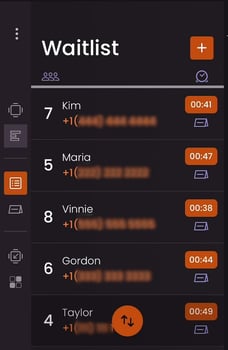
- Drag it higher to prioritize, or lower to reduce priority.
-
Release it to the desired position.
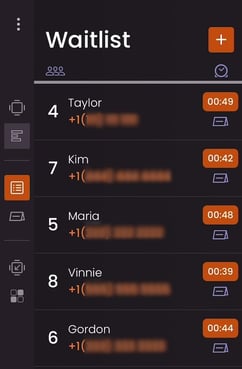
- Taylor was last on the Waitlist and has been moved to the top position.
Drag and Drop Parties - Video
- Select a party on the waitlist to expand the individual details and select 'SEAT IMMEDIATELY' to assign them a table. Let's walkthrough seating Tom's party.
Just like that–you're ready to stop losing walk-ins and manage your waitlist! Keep reading to see how you can use SpotHopper Reservations with your waitlist app.