Contents:
- Activating the Job Management System
- Customizing the Job Page
- Configuring the Application Form
- Setting Up Notification Preferences
- Managing Job Applications
Activating the Job Management System
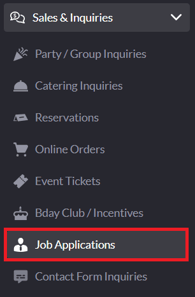
1. To get started, log in to your SpotHopper account. From the left-hand sidebar, click the "Job Applications" tab under "Sales & Inquiries."
2. On the next page, click the "Activate Now" button.
-png-1.png?width=635&height=363&name=annotely_image%20(29)-png-1.png)
3. The toggle at the top of the Settings page should be turned on and read "Built in SpotHopper Jobs Management System Activated."

Once you activate the Jobs Management System, a "Jobs" tab will automatically appear on your website's navigation bar.
Customizing the Jobs Page
Just below the toggle, you will see a "General Page Settings" section.

Here you will be able to customize how your Jobs page will look on your website.
Page Title/Name - You can set the page name. This is what appears at the top of your Jobs page, as the title.
Page Description/Message to Applicants - This appears below the title and should be a short, welcoming description encouraging applicants to apply.
Images - Although optional, you can upload up to six images to display as a gallery.
Tip: Use real photos of your team or venue to make your page more inviting.
-png-1.png?width=582&height=311&name=annotely_image%20(31)-png-1.png)
Configuring the Application Form
Below the General Page Settings, you’ll find two key sections: Application Form Settings and Available Positions.
Application Form Settings
This section lets you choose some additional options applicants will see when submitting their application.

Allow applicants to opt in to receive text messages:
Enabling this option adds a checkbox to your job form that allows applicants to subscribe to your text list.
You can customize the message next to the checkbox (for example:"I’d like to get texts about specials, events, and exclusive offers...")
We highly recommend keeping this box checked — it’s a simple way to grow your texting subscriber list while applicants express interest in your business.
Allow applicants to upload photos on the application form:
Checking this box lets applicants upload a photo with their submission if they want to, but this is entirely optional.
Available Positions
Under this section, you can define which positions are currently open and available for applicants to choose from.

The list includes 35 standard job titles commonly used in the hospitality industry — such as Bartender, Server, Line Cook, Host/Hostess, etc.
If your position isn’t listed, you can easily add your own custom position:
-
-
Click the "Add Custom Position" button (the plus icon).
-
Type in the title of the new position.
-
Repeat as needed — you can add multiple custom roles at once.
-

Your applicants will see the chosen positions on the application form and they can check the box for the position they are applying for.
This setup ensures applicants can easily apply for the correct role, and you’ll receive organized submissions for each position.
Setting Up Notification Preferences
Finally, configure your contact and notification settings.

Phone Number - Add a phone number that your applicants can call with any questions. This phone number will be visible on the Jobs page and appear right after your page description.
Email Recipients - Add the email addresses that will receive notifications for inquiries. You can add up to three email notification recipients - perfect if multiple managers handle hiring.
Set Up Text Alerts - By clicking the "Configure Text Notifications" button, you will be able to add phone numbers that will receive text alerts as well.
Text notifications are especially useful if you’re busy and don’t check your emails regularly. These alerts help ensure every application gets noticed and allow you to respond to applicants more quickly.
Reviewing and Managing Applications
Once an applicant submits their form, you’ll receive a notification and can manage every step of the hiring process directly from your SpotHopper dashboard.
How You Will Be Notified
📧 Email: All recipients listed in your notification settings will get an email with the application details — including the applicant’s name, contact information, experience, position applied for, and any attached file (resume, photo, etc.)

📱 Text Message (if configured): If you’ve set up text escalation alerts, you’ll also be notified via text:

🖥️ SpotHopper Dashboard: Inside your dashboard, you’ll see a notification in the Job Applications tab under Sales & Inquiries.
Processing the Applications
- To manage your applications, open Sales & Inquiries → Job Applications.
- This will take you directly to the List view, where your applications will be listed.

-
Clicking into an application opens the Inquiry Details page.

On this page, you can:
- View Inquiry Details on the right side of the page (name, contact info, experience, uploaded files, etc.)
- Update the application status to track progress.
Changing an application’s status won’t send a notification to the applicant. You can freely update statuses at any time to help you track each candidate’s progress internally.
- Write an internal note (not shown to the applicant)
- Respond directly to the applicant using the message composer located on the left side of the screen.
Note: If you've switched back to the old Inquiry Details page, your view will be slightly different from what's described above.
The inquiry details—including status changes and internal notes—appear at the top of the page.

The message composer box is found at the bottom.

The New Inquiry Details Page features an enhanced layout and improved functionality. We recommend switching to this updated version for the best experience.
