Contents:
- Before You Begin
- Step-by-Step Connection Guide
- WATCH: How to Connect Facebook & Instagram to SpotHopper
- WATCH: How to Create Social Media Posts From Scratch
Before You Begin
Before getting started, confirm the following:
✅ You can log in to the personal Facebook account associated with your Business Page.
✅ Your Facebook account has Full Control (admin access) to the Facebook Business Page you want to connect.
✅ If you're also connecting Instagram, make sure your professional Instagram account is linked to that Facebook Business Page.
To connect social media accounts to SpotHopper, the personal Facebook account you're using must have Full Control (admin access) to the Facebook Business Page.
To check your access level, switch to the appropriate Facebook Business Page and navigate to Settings & Privacy → Settings → Page Setup → Page Access.

 If your profile is not listed under "People with Facebook access," ask an existing Page Admin to update your access level.
The admin should click the "Add New" button, add your Facebook profile, enable Full Control, and then choose "Give Access" to grant the necessary permissions.
Step-by-Step Connection
1. Log in to your SpotHopper account, then navigate to the "Social Media Accounts" tab under "Settings." 

Or "Reconnect," if you were previously connected.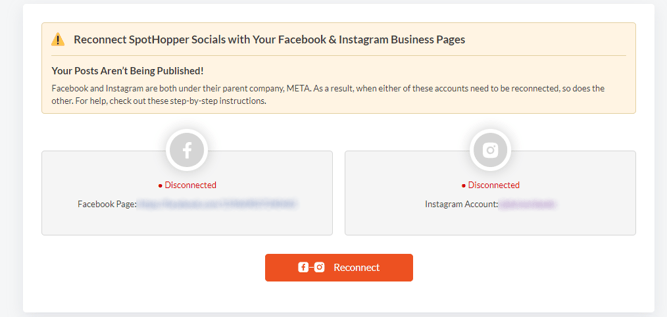
3. Once you click on "Connect/Reconnect," a pop-up will appear, notifying you that you can only sign in with the credentials of a personal Facebook Account that has FULL ADMIN ACCESS to the Business Page you wish to connect.
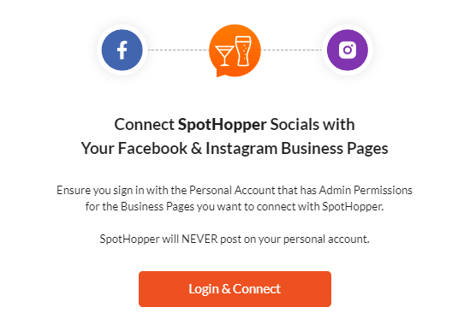
If you already have Admin Permissions, click on "Login & Connect" to start the process.
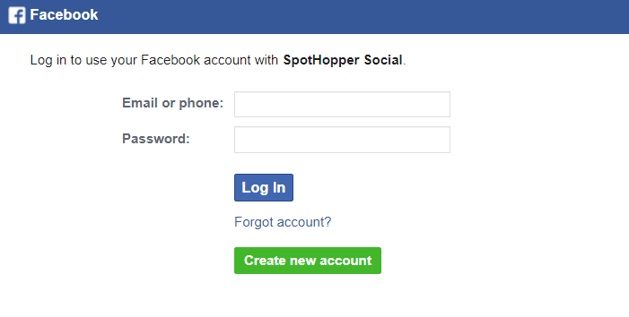
4. A Facebook pop-up will appear asking you to log in.
5. At the next step, you will be asked whether you wish to "Continue as...".
However, if your account has already been connected to SpotHopper Social, this pop-up will appear:

Depending on the pop-up, click on "Continue as..." or "Reconnect."
6. Next, you will have to choose which Businesses SpotHopper can access:
Choose the "Opt in to all current and future Businesses" and hit "Continue."
7. At the next step, you will be asked to choose the pages you want SpotHopper to access. Make sure to select "Opt in to all current and future pages."


⚠️By selecting "Opt in to all current and future pages," you are not actually connecting multiple accounts. Later, you will be prompted to choose which Facebook page you wish to connect to the SpotHopper account.
8. If you have an Instagram Account connected/linked to your Facebook Business Page, then you will be asked to choose the IG accounts you want SpotHopper to access. Again, make sure to select "Opt in to all current and future Instagram Accounts."

Click on "Continue."
9. Finally, review the permissions you've given to SpotHopper, and click the "Save" button.

10. You will get a confirmation pop-up saying that you have been connected to SpotHopper Social. Click on "Got It."
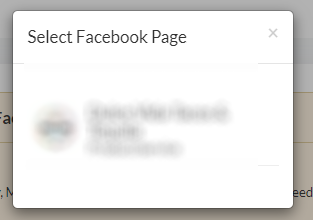
11. A final pop-up appears with the list of your pages. Find and select the correct page to sync with your SpotHopper account.
Your Instagram account will auto-connect once Facebook has been successfully connected.
If Instagram didn't auto-connect, please check our guide on connecting Instagram to SpotHopper.
12. Make sure the status of your Facebook page is marked as "Connected" and check that the right page is connected by clicking on the name.
Nice job connecting! Your page should look like this:

Ready to Start Posting?
👉 Learn how to create social media posts in SpotHopper.
Prefer a quick visual walkthrough? Watch the video below.