Contents:
- Getting Started with Event Planner
- E-Contracts
- Proposals & Payments
- Sending Attachments
- Auto Responses & AI/Template Responses
Getting Started with Event Planner
The Event Planner gives your venue everything it needs to turn private party and catering inquiries into confirmed events fast, without the endless email chains and follow-ups!
With Event Planner, you can handle every stage of the booking process — from the first message to the signed contract and payment — all within your SpotHopper dashboard. It’s the simplest way to stay organized, impress guests, and lock in more high-value events before competitors do.
💡Every minute you wait to confirm an event is a chance for another venue to swoop in. Event Planner helps you win business on the spot — show off your menus, collect deposits instantly, and secure bookings before guests even start shopping around.
How to Enable EventPlanner
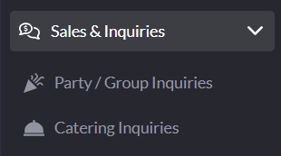
If your package doesn't include Event Planner, navigate to the "Sales & Inquiries" cluster on the left sidebar and choose either "Party/Group Inquiries" or "Catering Inquiries."
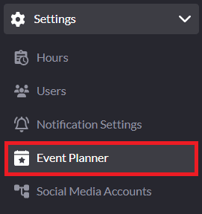
2. Go to the "Settings" tab, and scroll down to the "Event Planner" section and hit the "Only Available with EventPlanner" button.

That will open up the Event Planner page, where you'll have the chance to upgrade.
Alternatively, you can access this page by navigating to the "Event Planner" tab under "Settings."
Once upgraded, you can start using all the benefits of EventPlanner to:
-
Send and track E-Contracts for signatures.
-
Create and manage Proposals and Payment Requests (for deposits, cancellations, or partial and full payments).
-
Store reusable documents and contracts for fast replies.
- Send Attachments with each reply.
- Send Automatic and Standard Responses (Auto and AI responses are available without Event Planner on the new Inquiry Details page)
E-Contracts
With Event Planner, you can upload and send E-Contracts that customers can sign digitally — making it easy to confirm private parties and catering bookings quickly and securely.
How It Works
-
Upload contracts to your E-Contracts Library under Settings that can be used as templates.
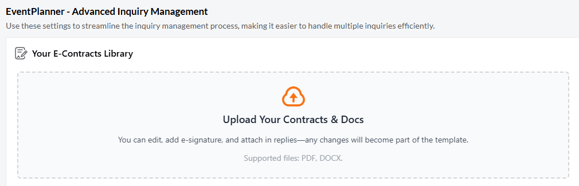
Supported formats: PDF and DOCX (up to 20MB). -
Once uploaded, you can attach contracts to messages using the Attach Contract & Add E-Signature button.
-
Guests can view and sign online, and all signed documents are stored automatically in the inquiry.
For instructions on how to set up and use the e-contracts features, please refer to our "Secure Private Party and Catering Inquiries with E-Signature Contracts" guide.
Proposals & Payments
With Event Planner, you can easily create and send payment proposals for deposits, cancellation fees, partial and full payments — helping you secure bookings and reduce no-shows with just a few clicks.
How It Works
-
Set up your default payment types and amounts under your Event Planner Settings.
You can define default values for different payment types and choose which options will appear when creating proposals.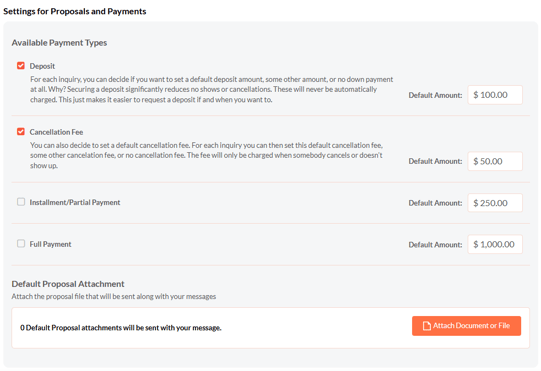
-
Under the Payment tab within any inquiry, you can create a new payment request, and add all details — choose the payment type and amount, set a due date, and include any notes or attachments.
-
Send the proposal directly through SpotHopper.
-
Guests can view the proposal online and complete the payment to secure the booking.
⚠️ Note: Connecting Stripe is a required prerequisite for sending proposals and collecting payments. Without Stripe connected, you cannot receive online payments. Learn how to connect Stripe here.
You can find the detailed instructions on how to create and send payment proposals here.
Sending Attachments
With Event Planner, you can include supporting files — such as menus, floor plans, or event packages — with each inquiry response. Attachments make it easy to share event details, visuals, or pricing information that help guests make decisions faster.
How It Works
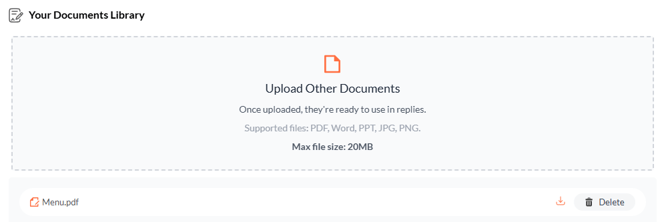
You can attach files to any message or proposal and also store reusable templates in your Attachments Library for future use.
To manage templates in your Attachments Library:
-
Go to the Settings tab for either Private/Group Inquiries or Catering Inquiries.
-
Scroll to the Event Planner section.
-
Under Attachments Library, click Upload File to add templates like menus, pricing sheets, or event brochures.
-
These saved files will be available anytime you reply to inquiries or create new proposals.
To send attachments with an inquiry:
-
Open an Inquiry from your dashboard.
- Click the "Attach File/Doc" in the lower-left corner.

-
Upload a new file or choose an already attached one from your Library.

-
Send your message — your files will be included and automatically saved in the inquiry.
If you have switched back to the Old Inquiry Details Page, then your attachment button will be found in the lower-right corner of the message panel.

Auto Responses & AI/Template Responses
*Auto Responses are available to all customers on the new inquiry details page and exclusively with Event Planner on the old inquiry page.
*AI Responses are only available with the new layout upgrade.
If you've switched back to the old view, you can unlock these by upgrading to the new page by clicking the "Switch to New Layout" at the top of the page.

Auto Responses
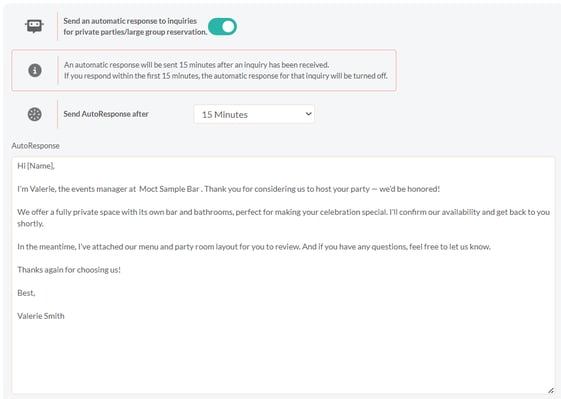
Auto responses let you automatically send a personalized reply to guests after they submit a private party inquiry. This helps you respond quickly, even outside business hours, and keeps guests engaged while they wait for a follow-up.

-
Send an automatic response to inquiries: Toggle this setting On to enable automatic replies.
-
Send Auto Response after: Choose how long after an inquiry is received the response should be sent (e.g., 15 minutes).
Note: If you manually respond before the selected time, the automatic response for that inquiry will not be sent.
-
Auto Response Message: Customize the message guests receive after submitting their inquiry. You can include your name, a thank-you note, and any helpful details about your event options.
- Attachments: You can attach relevant files, such as menus or floor plans, to be sent automatically with your message.
AI/Template Responses
If your subscription includes Event Planner but you haven't upgraded to the new Inquiry Details Page yet, you will have standard responses available.
The AI/Template Responses feature helps you manage inquiries faster by using AI-generated replies that automatically adapt to each customer’s request. This ensures consistent, professional communication while saving you time.
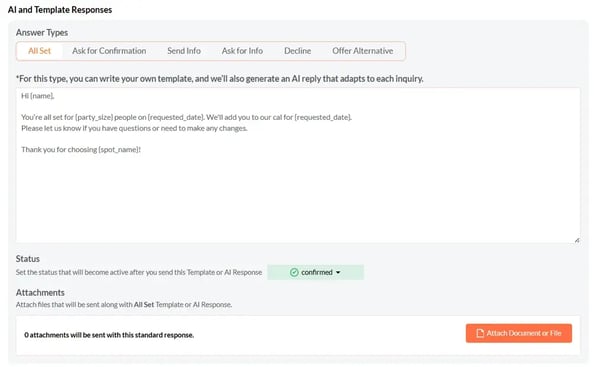
Answer Types: Choose from several response types to fit the situation:
-
All Set: Confirms a booking or inquiry.
-
Ask for Confirmation: Requests confirmation from the guest.
-
Send Info: Provides additional details, such as menus or event options.
-
Ask for Info: Requests more details from the customer about their event.
-
Decline: Politely informs the guest that you can’t accommodate their request.
-
Offer Alternative: Suggests a different date, time, or option if their first choice isn’t available.
You can also set an inquiry status for each response type. For example, set "Confirmed" when selecting All Set, "Cancelled" when declining an inquiry, or "Waiting on Customer" when you need more information or a follow-up from the guest. This helps you stay organized and manage inquiries more efficiently.
⚠️Your Private Parties and Catering pages each have their own Event Planner settings. This means you can set up unique contracts, attachments, and default payment settings for each, allowing you to customize your setup for different types of events.
WATCH: How to Use EventPlanner