Contents
- Scheduling Texts
Quick Text Blasts
Scheduling Texts from Promotions
Promoting Specials by Text
Promoting Events by Texts - Reviewing, Editing, and Approving Texts
- WATCH: How to Send Text Blasts to Customers
Scheduling Texts
Once your texting feature is activated, you can begin sending text messages to your customers. If texting hasn’t been enabled yet, follow the instructions in our "Setting Up Texting" guide to get started.
Quick Text Blasts
-
Navigate to the "Texting" page under "Marketing."

- Click the "Text Blast" tab located at the top center of the screen.

- On this page, you can either choose a prewritten text blast, or write your own from scratch:

- Click the "Preview" button to see how the text message will look:

- Choose to "Send Now," schedule for 1 or 4 hours, or "Pick Date & Time."|

- Once the text has been scheduled, you will see the green confirmation banner below the preview:

- The scheduled text will also show under the "Text Preview" tab.


Scheduling Texts from Promotions
You can also schedule a text from a promotion, allowing you to include a clickable CTA link—like your Specials or Order page.
Opening the Template
For a new promotion, you can simply click the "Create New Text" button from the upper right corner of the Marketing → Texting page.

This will open the Texting tab for a new, custom promotion.

The Texting channel is active by default, while Website, Email, and Social remain off. This means your promotion will be saved only as a text blast unless you choose to enable the other channels manually.
Adding the Details
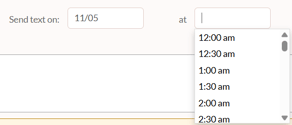
- Choose the date and time for the text blast.
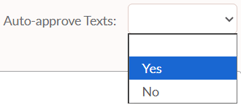
- Choose whether you'd like the text to be automatically approved or not.
- Add the content of the text.

The "customer_name" is a placeholder that will be replaced with the actual name of your customer. If you wish to save on characters, you can delete the "Hi customer_name" intro. - Choose the CTA link. This can either be an existing page on your website, or you can select the Custom URL option and paste your desired link there. The link will be added after the content of your text message.

- When done, click the green "Save" button in the lower right corner.
Once scheduled, the text will show under the Text Preview tab on the Texting page, where you can make further changes if necessary.
💡Alternatively, you can set up full multi-channel campaigns here → Creating Custom Promotions or create texts for Standard Promotions.
⚠️Remember, you can only schedule 1 text per promotion.
Promoting Specials by Text
-
Navigate to the "Specials" page under "Marketing."

- Find the daily special you wish to promote via text, and check the messaging icon.

- A pop-up will immediately appear with the details for your text blast:

- Here, you can edit your text message and choose the date and time.
- When ready, click the "Save & Schedule" button.
You’ll find your scheduled text under the Text Preview tab on the Marketing → Texting page.
Promoting Events by Text
-
Navigate to the "Events" page under "Menu & Content."

- Find the event you wish to promote via text, and check the messaging icon.
-png.png?width=572&height=205&name=annotely_image%20(12)-png.png)
- A pop-up will immediately appear with the details for your text blast:

- Here, you can edit your text message and choose the date and time.
- When ready, click the "Save & Schedule" button.
You’ll find your scheduled text under the Text Preview tab on the Marketing → Texting page.
Reviewing, Editing & Approving Texts
Once you schedule your texts, go to the "Texting" page under "Marketing."
You will immediately land on the "Text Preview" tab, where all of your scheduled texts will be listed.

Review the texts and see if you need to make further changes. You can edit the texts by clicking the pencil icon.

Besides customizing the message content and date, you can even send a test text to preview your blast before it goes out.
Simply enter your phone number in the Test Recipient field and click the "Send Test" button.

More Text Ideas
Below your scheduled and activated texts, you will notice "More Text Ideas" light bulb icon.

Clicking the icon generates text suggestions based on your original message, giving you more options to choose from.
Approving Texts
At the top left of the Texting page (under the Text Preview tab), you’ll see if your texts are set to auto-approve or need manual approval.

Approve Each Text First - Manual approval is needed. Once you schedule the text, make sure to click the green heart icon ![]() below the text to activate it.
below the text to activate it.
Texting on AutoPilot - Everything is pre-approved. The platform automatically sends your scheduled texts; no manual approval needed.