Contents:
- Creating an Email Blast from Scratch
- Creating Email Blasts for Existing Content
Email for Standard (Ongoing) Promotions
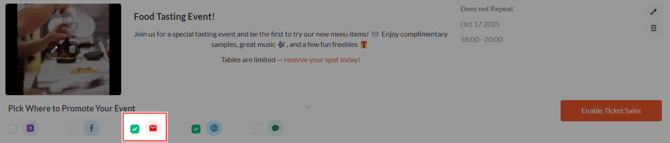
Email for Events
Creating an Email Blast from Scratch
🧭 Opening the Email Template
- To create an email blast, start by navigating to the "Emails" page under "Marketing."

- In the top-right corner, click "Create New," then select "Create Custom Promotion."
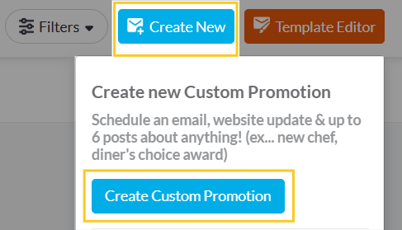
- This will open the Email template, where you can begin designing your email.
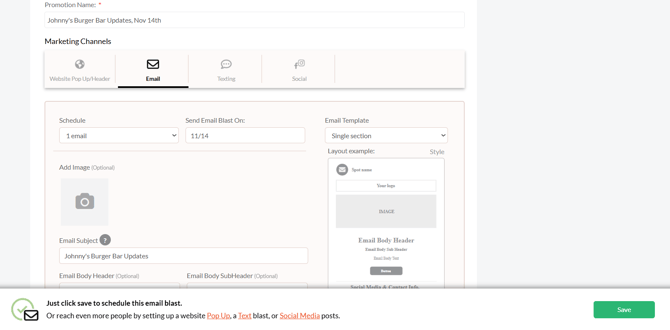
The Email channel is active by default, while Website, Texting, and Social remain off. This means your promotion will be sent only as an email blast unless you manually enable other channels.
The system automatically generates the promotion name in the format: “Restaurant Name Updates, Date.”
You can edit this and make it easier to identify the promotion later on under Marketing → Campaigns & Promotions.
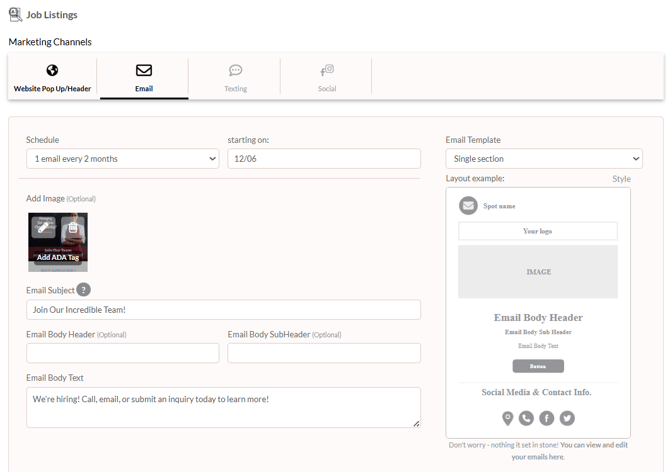
✏️ Designing Your Email Blast
With the Email Template open, you can start designing the email blast by adding the details and personalizing your message.
-
Schedule the Email Blast
You can only schedule one email blast per custom promotion.
Next to "Send Email Blast On," choose the date you’d like your blast to go out.
-
Select an Email Template
Choose between:-
Single Section (default): Ideal for most campaigns.
-
Multiple Sections: Adds all the sections you’ve selected under the email template editor.

-
-
Add Your Email Content
Include your image (optional), email subject, header/subheader (optional), and email body text.
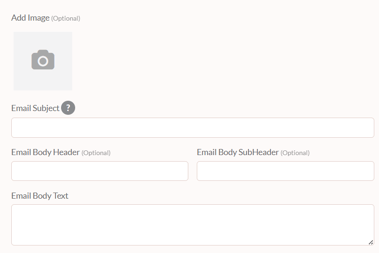
💡 Make sure to add an eye-catching email subject. If you leave the field empty, the platform will send your email with the Promotion Name as the subject.
-
Set a Call-to-Action (CTA)
At the bottom of the screen, set the clickable CTA button. The button destination can either be a website page (Menu, Reservation) or a custom URL.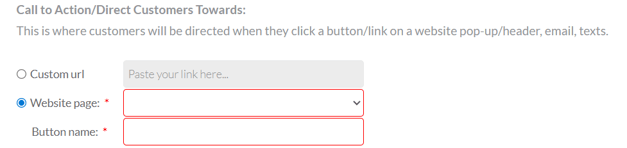
🎯 Your call-to-action button drives engagement, so make sure the name is clear and action-oriented like "Book Your Table" or "Reserve Now."
-
Save Your Email Blast
Review all your details, then click Save in the lower-right corner.
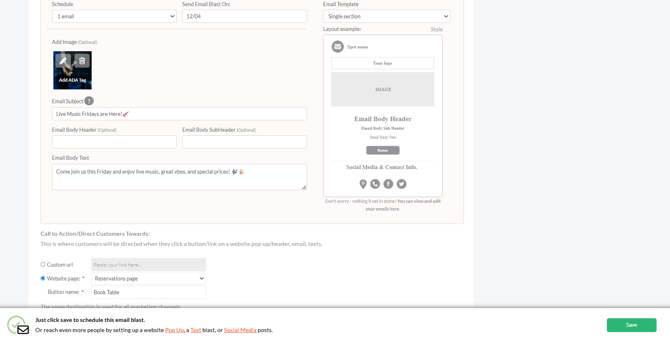
The preview of your scheduled email will appear under the chosen date on the Emails page, where you can make additional edits if needed.
You can also create email blasts as part of a multi-channel promotion. To send more than just an email, check out our Creating Custom Promotions article. The setup process is almost the same, but you’ll use the Next button to move through additional channels instead of clicking Save after completing the email details.
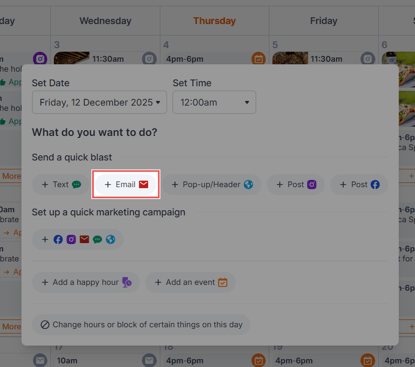
💡Alternatively, you can create email blasts directly from your Calendar page.
Creating Email Blasts for Existing Content
You can also schedule emails directly from existing content — like events or ongoing promotions — without creating a new campaign from scratch.
Click the sections below to learn how to set up these emails.